

[Prestashop help] How to manual Install a PrestaShop module with FTP or Hosting account?
Prestashop allow install a Prestashop module by 2 ways:
- Install a prestashop module from Backoffice: Go to Backoffice > Modules & Services, upload your module that is formatted to a *.zip file, then install it.
- Upload your prestashop module through a FTP or Hosting account, then go to Backoffice > Modules & Services and install it.
In this post, Buy-Addons Team will take you how to install a prestashop with FTP account or hosting account.
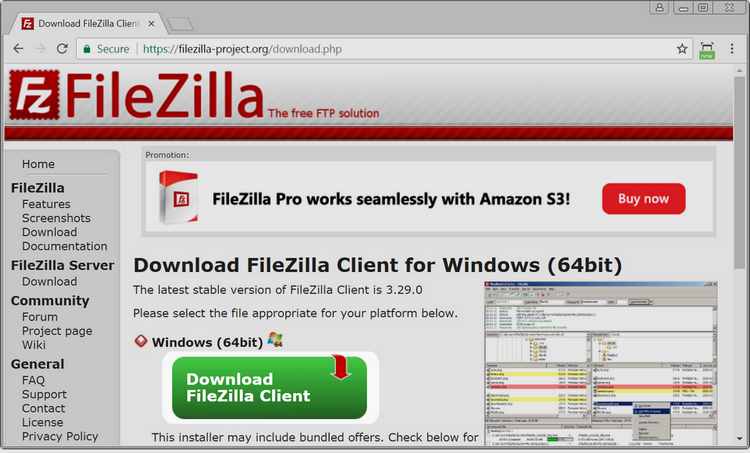
Step 1: Download & Install a FTP software for client, for an example we are using FileZilla Client software that you can download it at here: https://filezilla-project.org/download.php?type=client
Also you can use other FTP softwares as WinSCP, CuteFTP…
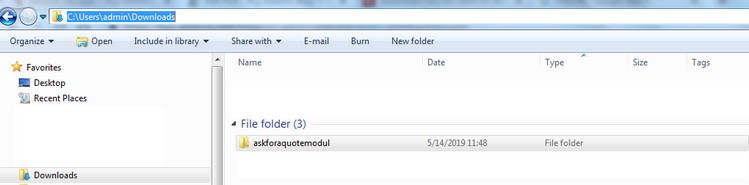
Step 2: Unzip your Prestashop module into a directory in your computer, example: We unzip askforaquotemodul.zip into “askforaquotemodul” directory in local path: C:\Users\admin\Downloads
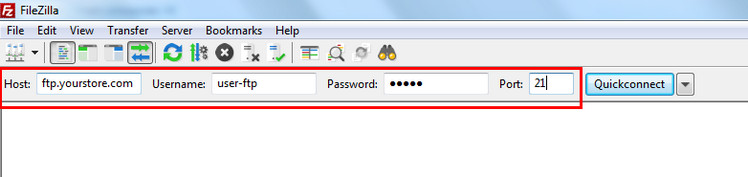
Step 3: Open FileZilla Software, enter your FTP account
- Host: Enter the address of your server for connect to it. example: ftp.yourstore.com or an IP of your server as 112.43.141.66
- Username: The username of your FTP account
- Password: The password of your FTP account
- Port: If you are using FTP account, enter 21. if your are using SFTP, enter 22
then click Quick connect.
You can view it in FileZilla software:
- Left sidebar: list directories of your computer
- Right sidebar: list directories of your server that contains Prestashop’s source of website.
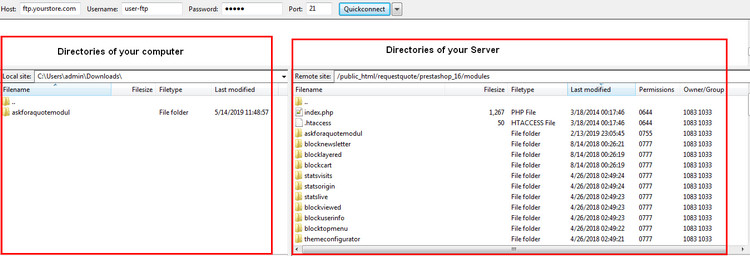
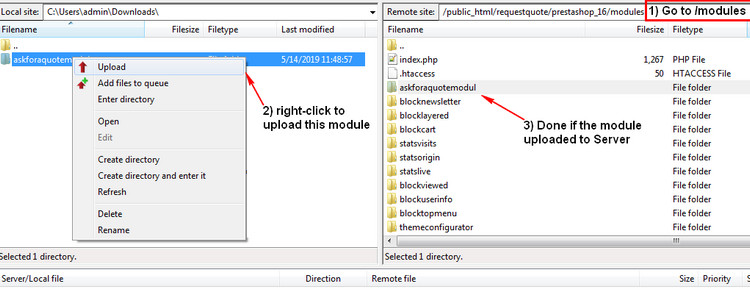
Step 4: Go to PRESTASHOP_ROOT/modules directory of your Server.
Then right-click to upload your prestashop module from your computer to PRESTASHOP_ROOT/modules directory.
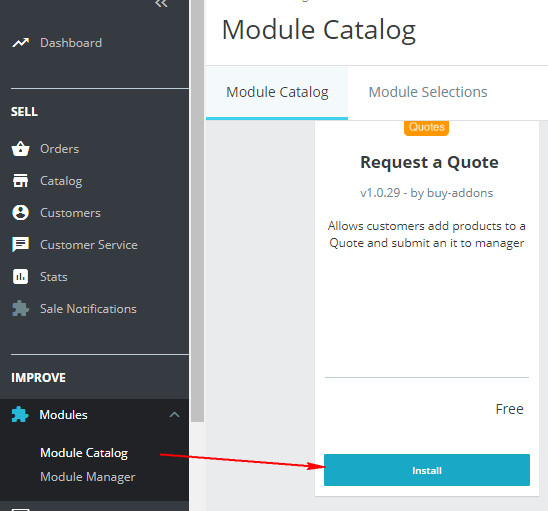
Step 5: Go to Prestashop Backoffice > Modules & Services (in Prestashop 1.6) or Modules > Module Catalog (in Prestashop 1.7), search your prestashop module and install it.
Related Articles

![[PrestaShop developement] Ten Ways To Improve Your PrestaShop Modules!](https://buy-addons.com/blog/wp-content/uploads/2019/05/10-ten-improve-prestashop-module-1-120x120.png)
![[Prestashop help] How to manual Install a PrestaShop theme with FTP or Hosting account?](https://buy-addons.com/blog/wp-content/uploads/2019/05/install-prestashop-theme-4-120x120.jpg)
![[Prestashop Developement] Use Cookie & Session in a PrestaShop Module](https://buy-addons.com/blog/wp-content/uploads/2019/04/cookie-testing-4-120x120.png)
![[Prestashop help] Setup Social Facebook Login for Prestashop Store](https://buy-addons.com/blog/wp-content/uploads/2019/03/Banner-590_300-120x120.png)
-
How to setting Prestashop Invoice Number for PDF without a module?
In default, Prestashop create an invoice PDF filename, invoice number… with format: #IN000001, #IN000002… if you want change this formatting, you can…
-
How to Fix 502 Bad Gateway Error Using Nginx in Prestashop website?
How you might see the 502 Bad Gateway error Different websites may customize the 502 bad gateway error message. Here…
Leave a reply
You must be logged in to post a comment.